When To Start a Beehive: Best Seasons and Tips for Success
Starting a beehive is an exciting and rewarding endeavor. But timing is crucial to your success.
So, when is the best time to start a beehive? The ideal time to start a beehive is in the spring. This is when flowers bloom, providing ample nectar and pollen. Bees need these resources to build their hive and produce honey.
Starting in spring gives your bees time to establish themselves before the winter. It aligns with their natural growth cycle. Understanding the right timing ensures your bees are healthy and productive. Planning ahead and preparing properly can make your beekeeping experience smooth and enjoyable. In this blog, we will explore the best practices for starting a beehive, ensuring your new venture thrives.
Choosing The Right Season
Choosing the right season to start your beehive is crucial. Different seasons offer various advantages and challenges for beekeeping. Knowing when to begin can affect the health and productivity of your bees.
Spring
Spring is the most popular season for starting a beehive. The weather becomes warmer, and flowers start to bloom. These conditions provide bees with abundant nectar and pollen sources. Bees can establish their colony and grow strong by summer. Starting in spring gives them enough time to build up honey reserves.
Summer
Starting a beehive in summer is also possible. Bees can still find plenty of nectar and pollen. However, you need to ensure they have enough time to build their colony. Monitor their progress closely, as they may need extra feeding. Summer hives may not produce much honey in the first year. Focus on building a healthy colony for the next season.
Fall
Starting a beehive in fall is more challenging. Bees have less time to prepare for winter. You must provide extra care and feeding to help them survive. Fall hives may struggle to build up their numbers and honey reserves. Consider waiting until spring for better success. If you start in fall, be prepared for a higher maintenance commitment.

Credit: www.youtube.com
Preparing Your Equipment
Starting a beehive is an exciting journey. Before you welcome your first bees, it’s essential to prepare your equipment. Proper preparation ensures a healthy hive and a smooth beekeeping experience. Let’s dive into the key components you’ll need.
Hive Components
The hive is the heart of your beekeeping operation. It consists of several parts:
- Hive Stand: Keeps the hive off the ground and protects it from moisture.
- Bottom Board: The base of the hive where bees enter and exit.
- Brood Box: Where the queen lays eggs and the colony grows.
- Frames: Hold the comb where bees store honey and pollen.
- Queen Excluder: Prevents the queen from laying eggs in the honey supers.
- Honey Supers: Boxes where bees store excess honey for harvest.
- Inner Cover: Provides ventilation and insulation.
- Outer Cover: Protects the hive from weather.
Protective Gear
Safety is paramount in beekeeping. Proper protective gear keeps you safe from stings:
- Bee Suit: A full-body suit that provides maximum protection.
- Veil: Protects your face and neck from bee stings.
- Gloves: Shield your hands while handling the hive.
- Boots: Ensure your feet are protected from bees on the ground.
Tools
Having the right tools makes hive management easier:
- Hive Tool: A multi-purpose tool for prying apart boxes and scraping.
- Smoker: Calms bees by masking alarm pheromones.
- Bee Brush: Gently removes bees from frames.
- Frame Grip: Helps lift frames from the hive.
- Uncapping Knife: Cuts wax cappings from honey frames.
Selecting The Perfect Location
Starting a beehive is an exciting journey. One of the most important steps is selecting the perfect location for your beehive. A good location ensures your bees thrive and produce honey. Let’s explore the key factors to consider when choosing the best spot for your hive.
Sunlight Exposure
Bees need plenty of sunlight. Place your hive where it gets morning sun. This helps bees start their day early and be active. Avoid places with too much shade, which can make the hive cold and damp.
Wind Protection
Wind can disturb your bees and make it hard for them to fly. Find a spot with natural windbreaks, like trees or bushes. You can also use a fence or wall to block strong winds. This keeps the hive stable and your bees comfortable.
Proximity To Water
Bees need water to drink and cool their hive. Ensure there is a water source nearby, like a pond or birdbath. If there is no natural water source, provide a shallow dish with water near the hive. This helps bees stay hydrated and healthy.
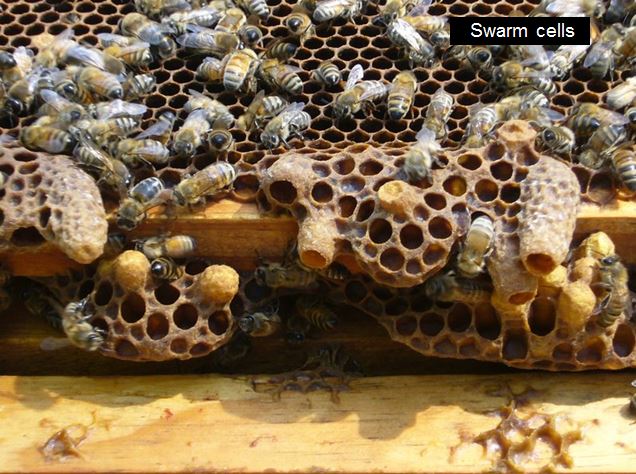
Credit: scientificbeekeeping.com
Acquiring Bees
Starting a beehive requires careful planning. One of the first steps is acquiring bees. There are several methods to obtain bees, each with its own advantages and considerations.
Buying Packages
Buying a bee package is a common method. It usually includes a queen and a few thousand worker bees. A package is ideal for new beekeepers. It is easy to handle and install in a hive.
Here are some key points to consider:
- Availability: Packages are widely available in spring.
- Cost: Usually affordable.
- Queen Acceptance: The queen might need a few days to be accepted by the workers.
Nucleus Colonies
A nucleus colony, or nuc, is a small bee colony. It comes with a queen, workers, and brood frames. This method is beneficial for quicker hive establishment.
Some advantages include:
- Established Colony: The queen is already accepted.
- Brood Frames: Includes brood in various stages.
- Growth: Nucs can grow quickly into a full hive.
Capturing Swarms
Capturing a swarm is an adventurous way to acquire bees. Swarms are natural bee colonies that have left their original hive. They seek a new home, and you can provide one.
Consider the following:
- Cost: Free bees!
- Experience: Requires some beekeeping knowledge.
- Timing: Spring and early summer are prime times for swarms.
Each method of acquiring bees has its own benefits. Choose the one that best fits your needs and experience level.
Setting Up The Hive
Starting a beehive is an exciting venture. It’s not just about placing a box in your backyard. You need to prepare well to ensure the success of your bee colony. Below, we’ll guide you through the essential steps of setting up the hive.
Assembling The Hive
Assembling the hive is the first step. You will need several components:
- Bottom board
- Hive body (also called brood box)
- Frames
- Inner cover
- Outer cover
First, place the bottom board on a flat surface. Then, put the hive body on top of it. Insert the frames into the hive body. Ensure they are evenly spaced. Finally, cover the hive with the inner and outer covers. Your hive is now ready.
Installing Bees
After assembling the hive, it’s time to introduce the bees. You can buy bees in packages or nucs (nucleus hives). Here’s how you can install them:
- Spray the bees lightly with sugar water to calm them.
- Remove the queen cage and set it aside.
- Shake the bees into the hive body.
- Place the queen cage between two frames.
- Close the hive and let the bees settle.
Be patient and gentle during this process. The bees need time to adjust to their new home.
Feeding Bees
Bees need food to thrive, especially in the beginning. Provide them with a sugar syrup solution. Here’s a simple recipe:
| Ingredient | Quantity |
|---|---|
| Water | 1 liter |
| Sugar | 1 kilogram |
Mix the sugar and water until dissolved. Place the solution in a feeder and position it inside the hive. Check the feeder regularly and refill as needed. This helps the bees build their comb and store food.
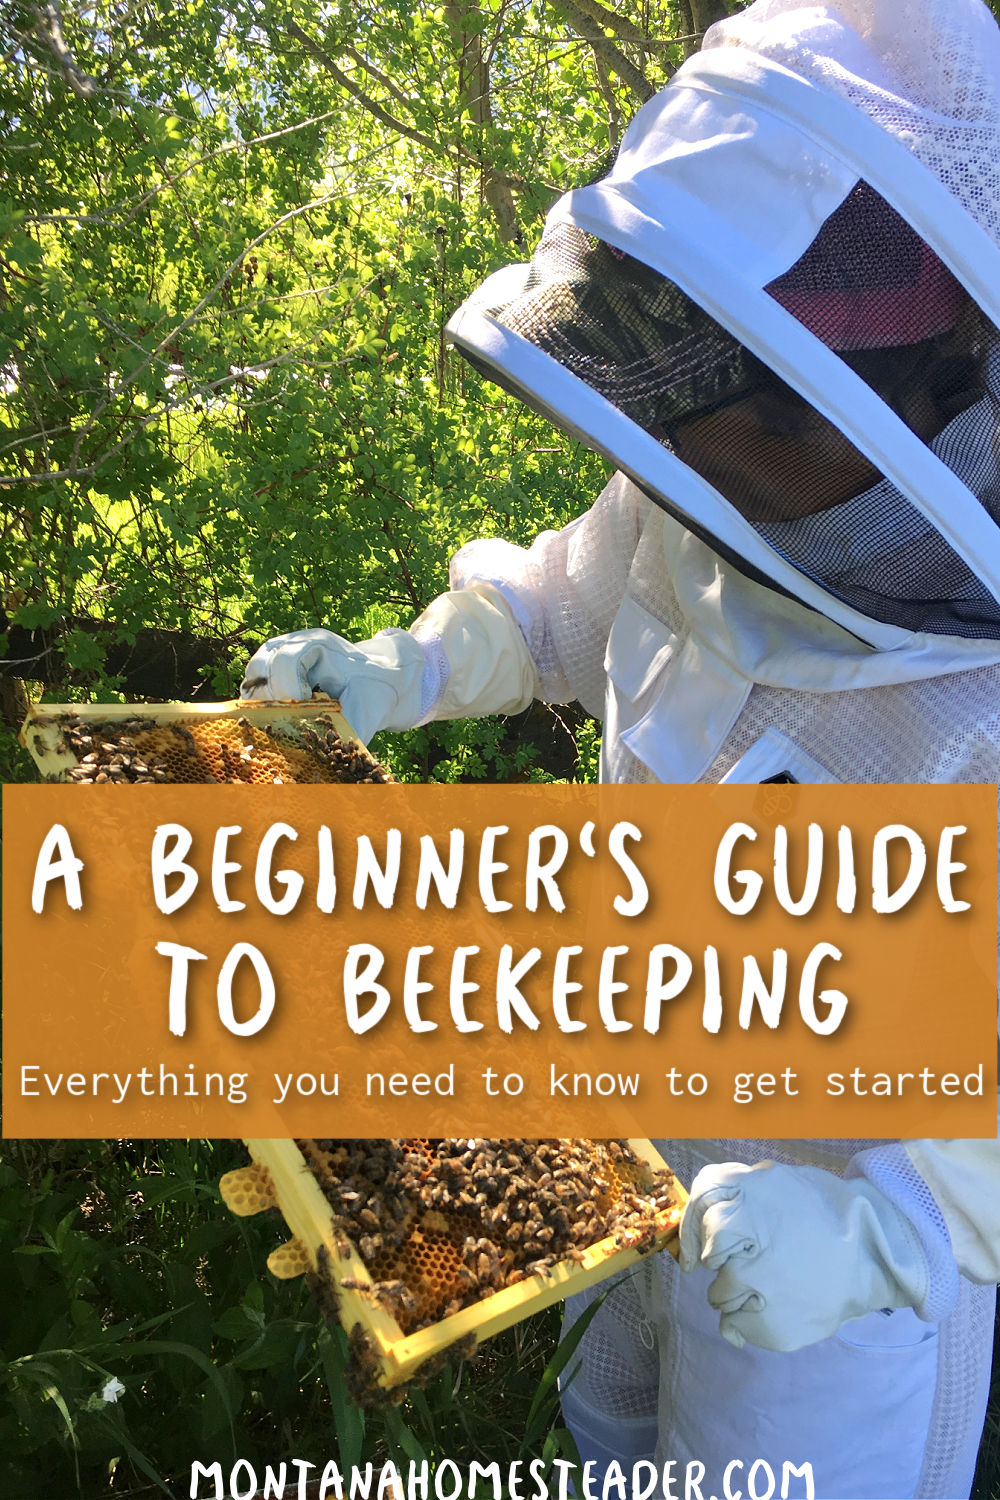
Credit: montanahomesteader.com
Monitoring And Maintenance
Monitoring and maintenance are crucial for the success of your beehive. Regular checks ensure the health and productivity of your bees. Proper attention helps identify issues early, preventing major problems down the line.
Regular Inspections
Performing regular inspections is essential. Aim to inspect your hive every 7-10 days during the active season. Check for signs of growth and honey production. Look at the brood pattern and ensure the queen is laying eggs. These inspections help you gauge the overall health of your colony.
Checking For Pests
Pests can cause significant damage to your hive. Be vigilant in checking for pests. Common pests include mites, beetles, and wax moths. Use sticky boards to monitor mite levels. Remove any pests you find during inspections. Keeping your hive pest-free ensures a healthy bee population.
Assessing Hive Health
Regularly assess hive health to ensure your bees are thriving. Look for signs of disease or distress. A healthy hive will have active bees, a good brood pattern, and plenty of honey stores. If you notice issues, take immediate action to rectify them.
| Inspection Task | Frequency |
|---|---|
| Check for queen activity | Every 7-10 days |
| Monitor mite levels | Monthly |
| Assess brood pattern | Every 7-10 days |
Maintaining a beehive requires dedication and vigilance. Regular monitoring ensures the long-term success of your hive. This proactive approach helps you address issues before they become major problems.
Seasonal Hive Management
Successful beekeeping requires understanding how to manage your hive throughout the year. This seasonal approach ensures that your bees remain healthy and productive. Below is a guide on the tasks you need to perform in spring, summer, and fall.
Spring Tasks
Spring is a crucial time for your hive. The bees are coming out of winter dormancy and need your support to thrive.
- Inspect the hive: Check for signs of disease and pests.
- Feed the bees: Provide sugar syrup if food stores are low.
- Expand the hive: Add extra frames or a super if the colony is growing.
Regular inspections help ensure the health of the hive. This is also the time to replace old or damaged equipment.
Summer Tasks
Summer is the peak season for bees. This is when they are most active and honey production is at its highest.
| Task | Description |
|---|---|
| Harvest Honey | Extract honey when frames are full. |
| Monitor Swarming | Look for signs of swarming and take steps to prevent it. |
| Provide Water | Ensure bees have a fresh water source. |
Keeping the hive well-ventilated during hot weather is also important. This helps maintain a stable environment for the bees.
Fall Tasks
Fall is the time to prepare your hive for winter. This preparation is essential for the survival of your bees through the colder months.
- Reduce Hive Size: Remove excess frames to minimize space.
- Check Food Stores: Ensure there is enough honey for winter.
- Inspect for Pests: Treat the hive for mites and other pests.
Fall tasks also include insulating the hive to protect it from the cold. A well-prepared hive can better withstand winter conditions.
Tips For Success
Starting a beehive can be an exciting journey. Success in beekeeping depends on proper planning and ongoing learning. Here are some essential tips to help you thrive in your beekeeping adventure.
Record Keeping
Keeping accurate records is crucial for managing your beehive. Track hive inspections, bee health, and honey production. Note down weather conditions and any treatments applied. This data helps identify patterns and improves decision-making. Use a notebook or digital app for easy access and updates.
Joining Beekeeping Groups
Connect with other beekeepers for support and advice. Join local beekeeping clubs or online forums. These groups offer valuable resources, mentorship, and camaraderie. Learn from others’ experiences and share your own. Networking with fellow beekeepers can lead to better hive management.
Continuing Education
Beekeeping requires continuous learning. Attend workshops, read books, and follow reputable websites. Stay updated on the latest practices and research. Understanding bee behavior and biology is essential. Invest time in learning to ensure your bees remain healthy and productive.
| Tip | Description |
|---|---|
| Record Keeping | Track hive inspections, bee health, and honey production. |
| Joining Beekeeping Groups | Connect with other beekeepers for support and advice. |
| Continuing Education | Attend workshops, read books, and stay updated on research. |
Frequently Asked Questions
What Is The Best Time To Start A Beehive?
The best time to start a beehive is in early spring. This allows bees to build their colony. Early spring offers optimal weather conditions.
How Do I Choose The Right Beehive Location?
Choose a sunny, sheltered spot with good drainage. Ensure it is away from high-traffic areas. Proximity to flowers and water is ideal.
What Equipment Do I Need To Start A Beehive?
You need a hive, bees, protective gear, and basic tools. A smoker and hive tool are essential. Additionally, have a feeder ready.
How Do I Get Bees For My Beehive?
You can purchase bees from a local supplier. Alternatively, buy them online or catch a wild swarm. Ensure you get healthy bees.
Conclusion
Starting a beehive requires careful planning and timing. Spring is often the best season. Bees can then gather resources and grow strong. Choose a sunny spot for your hive. Keep learning and stay patient. Your efforts will soon bring sweet rewards.
Remember, healthy bees mean a healthy hive. Happy beekeeping!